
Are you using Outlook for Mac? That’s great! Don’t forget about setting up a professional email signature. The signature is like a digital business card – people expect it to have all the important information and look good. If you’re wondering how to set up a professional email signature in Outlook for Mac, check out this quick guide.
How to create your Outlook for Mac signature in 10 steps
Setting up your email signature in Outlook for Mac is easy as Apple pie (pardon the pun). Just follow these ten simple steps and you’ll create your own signature in a snap.
- Click Outlook on the top menu bar and select Settings.
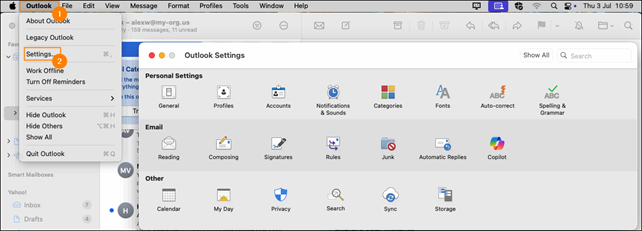
- In the Email section, select Signatures. The Signatures window will open.
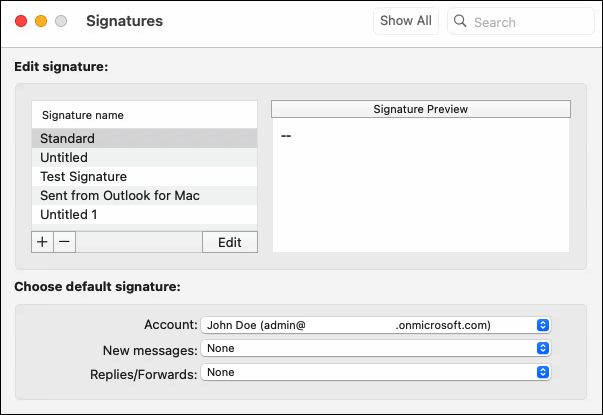
- Click the + button under the list of existing signatures to create a new signature. A separate window will open.

- Now, enter your signature’s name and take a quick look at the formatting options available on the toolbar. Depending on the size of your signature editing window, some of these options might be hidden on the menu under the

 (See more items) button.
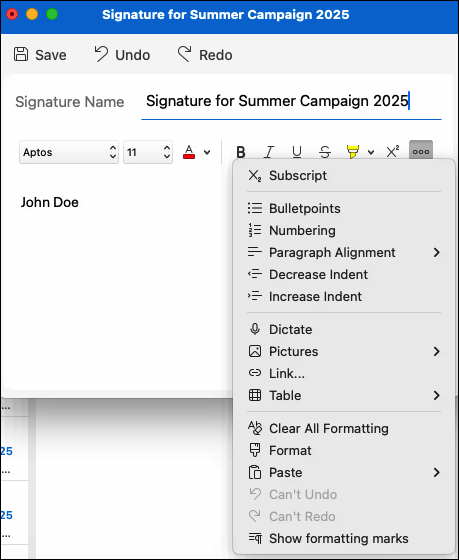
Tip: If you find the signature formatting options offered by Outlook for Mac to be too basic, check our free email signature generator. It comes with a portfolio of ready-to-use signature templates that you can quickly customize and insert into the Outlook for Mac signature editor.
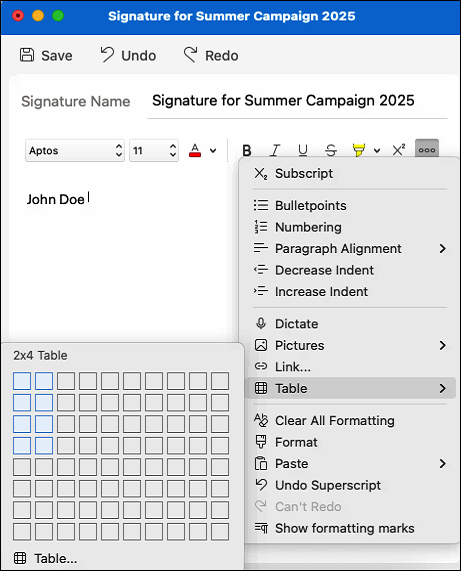
- If you want to add images or if you simply want to have greater control over different signature elements, it’s best to design the signature as a table. This will allow you to create a captivating signature that should always look good across all email apps. To insert a table, click Table on the toolbar (or under the See more items button) and choose the number of columns and rows, e.g. 2×4.
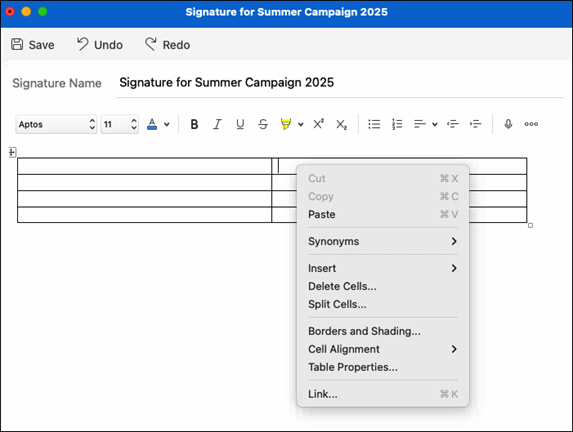
- Right-click the table in the editor to see formatting options, such as Split Cells or Cell Alignment, and adjust the table to your needs. If you need more advanced options, select Table Properties.
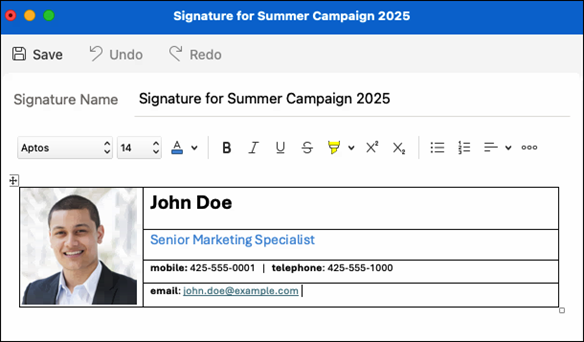
- Now, fill out your table with all the necessary information and format it as you like.
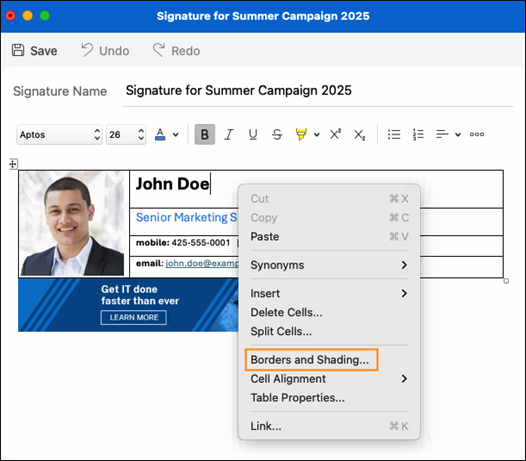
- Finally, don’t forget to set the table borders to None in the Borders and Shading settings of your table.
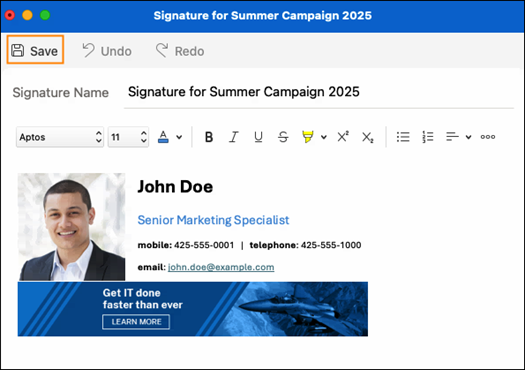
- After you add all the finishing touches, click Save and close the signature editing window.
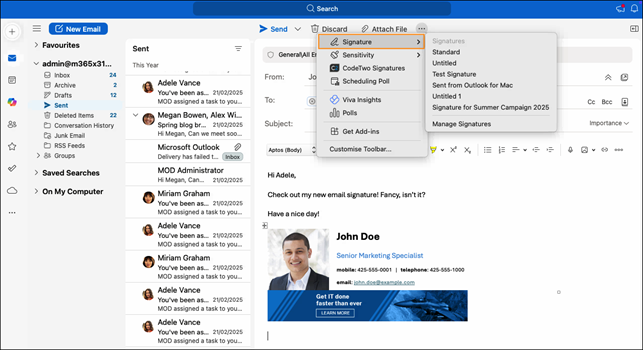
- Time to see the signature in action! Write your test email, click Signature on the top toolbar in Outlook (this option might be hidden under the Show more items button) and select the name of your signature. It will be added right below your message.
That’s it! Now, if you’re satisfied with your signature and want to use it in all your emails, you can set it as default in signature settings (Outlook > Settings > Signatures). You can also create a simplified signature for replies and forward messages there or add as many other signatures as you need.
Set up Outlook for Mac signatures for your organization
But what if you wanted to set up unified email signatures for all employees using Outlook for Mac in your organization? There are a few ways to do that. First, if you’re an admin (and your company allows it), you can simply log in to each of your colleagues’ accounts and add their signature manually. Time-consuming? Probably. To make it faster, you can ask all the employees to create their own signatures by themselves. As you can imagine, this can lead to a number of problems, since your colleagues might not set them up correctly or may just forget about them altogether.
The best choice here is to use a signature management tool that would allow you to design a unified, correctly branded signature template for all your colleagues who use Outlook for Mac or any other email app. For instance, you can use CodeTwo Email Signatures 365, a versatile solution that lets you globally manage email signatures from a web browser.
CodeTwo software can work in various modes, giving organizations full control over how they handle their email branding. The Outlook (client-side) mode of CodeTwo Email Signatures 365 comes with a dedicated Outlook add-in, co-engineered with Microsoft. It works with all Outlook versions, including Outlook for Mac, and adds signatures directly in the new message window, allowing users to see their signature in real time. If your organization uses other email apps as well, you can also run CodeTwo Email Signatures 365 in a cloud (server-side) mode to add signatures after an email is sent, regardless of the app.
And that’s not everything, since CodeTwo Email Signatures 365 allows you to create custom auto-reply messages, insert one-click CX surveys within signatures, or gather valuable marketing data insights. Want to really make your mark? Check the solution here.
See also: