
Here’s an easy guide on how to update email signature in other Outlook versions
Adding and changing email signatures in Outlook on the web
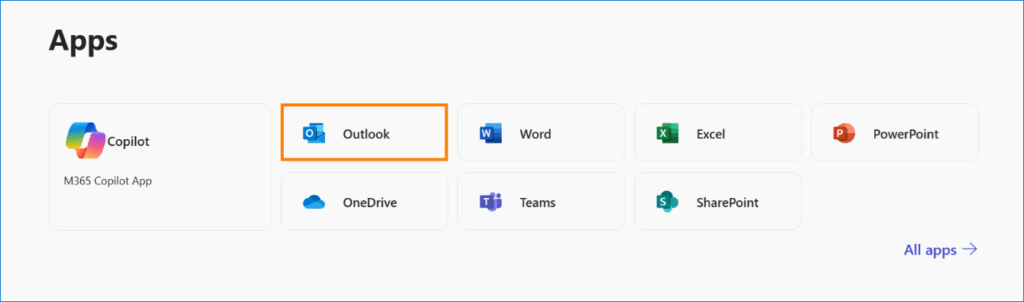
- To add or change your email signature, go to Outlook on the web – you can do this either by selecting the Outlook app on your Microsoft 365 home page, or by using this link.
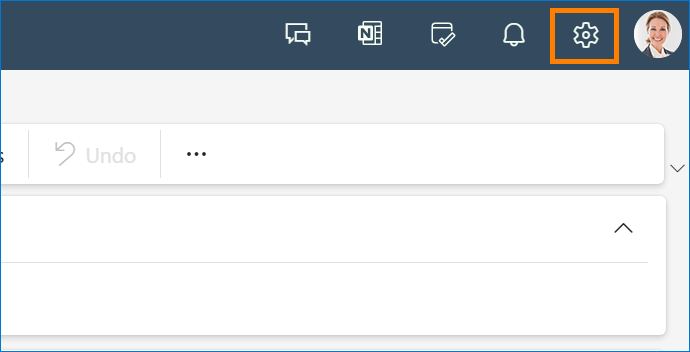
- Click the gear icon (Settings) in the top-right corner of the page.
- In the Settings window that opens, select Account, and then Signatures. You can also reach the signature editor panel by using this link.
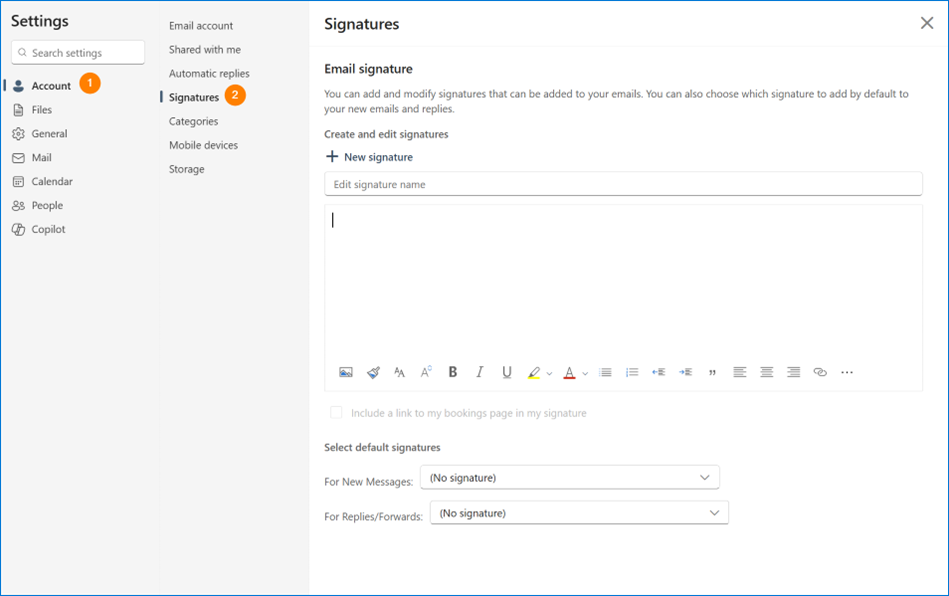
- Use the provided editor box to enter your signature text, apply formatting, and to add images and links.
Note: Instead of doing it all manually, you can also use an online email signature generator, which gives you access to a number of functional and good-looking signature templates. All you have to do is fill in your details, generate the signature, paste it into the editor in Outlook on the web, and voilà – you can use it for free.
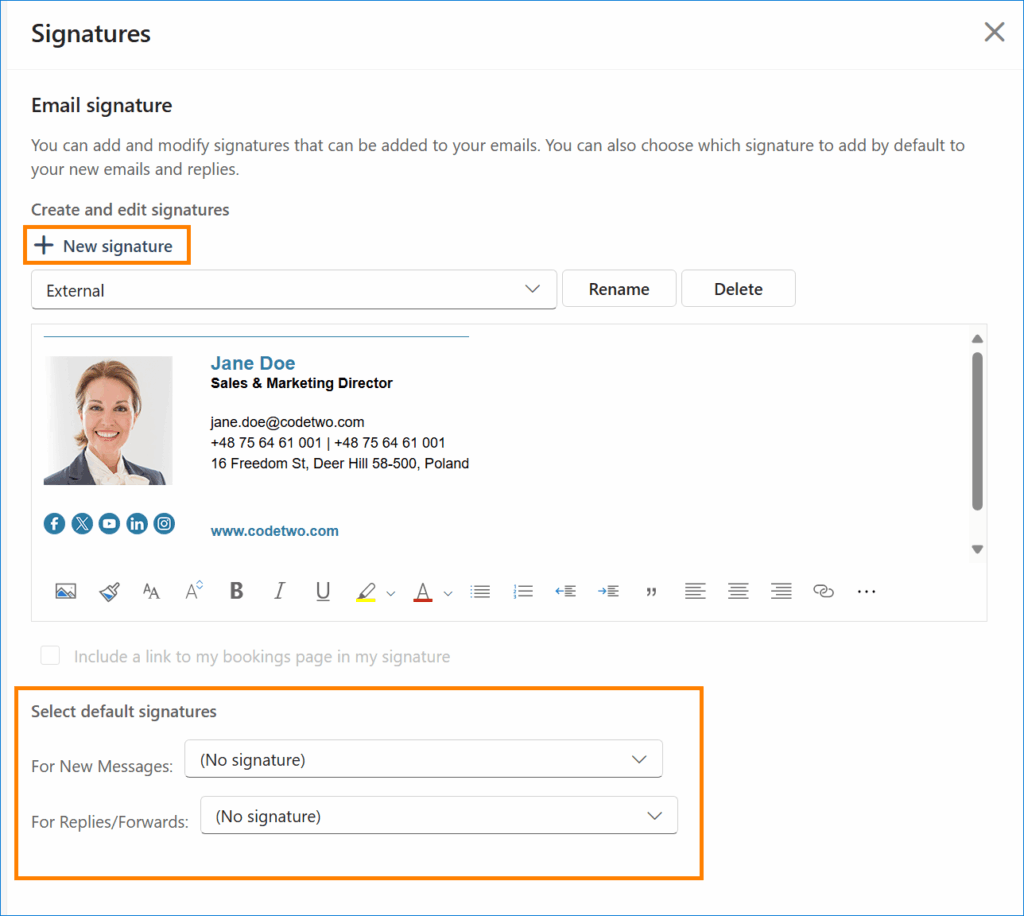
It is possible to create and use multiple signatures for a single mailbox – similarly to the Outlook desktop client. Just click the New signature button after you have saved your first signature to create another one.
The two options under the signature editor let you decide whether the selected signature should be added automatically (by default) to all your new messages and replies/forwards, respectively.
Once you’re happy with your signature, Save the changes and close the Settings window.
If you set this signature as the default one for new messages and/or replies and forwards, it will appear when you compose a new email or a reply/forward.
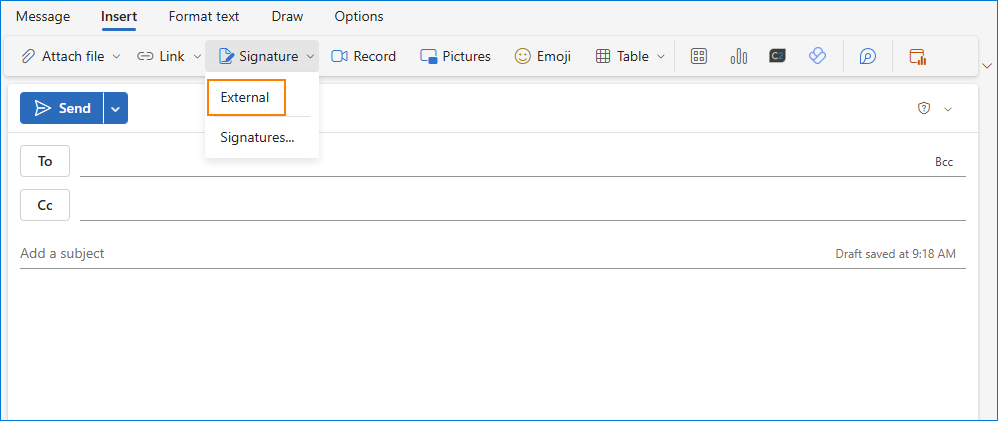
If you didn’t choose the signature to be added automatically to every new email, you will still be able to add it manually in the compose message window. To do this, go to the Insert tab, click Signature, and select the name of your signature from the drop-down list:
While it’s possible to design your signature directly in OWA, using a dedicated generator speeds up the design process significantly. Make sure that your signature reflects your personal brand, ensuring every message you send makes an impact. Check out the email signature generator and our template library to make the job easier for you. With this tool, you can quickly and effortlessly craft a professional email signature that aligns with your vision.
Signatures that roam
As you switch between different email clients, it may seem at times like you’ve lost access to your selection of tailor-made email signatures. Alternatively, the customized signatures you’ve set up across your devices may have synced unexpectedly.
The most likely reason for this phenomenon is a feature called “roaming signatures,” or “signature cloud settings” introduced by Microsoft in 2023. In layman’s terms, this functionality changes how Outlook email signatures are stored. Instead of being saved on a local drive, each signature is moved to the cloud and linked to the user’s account, making it accessible on all devices running Outlook for Windows, OWA or Outlook for Mac that are configured with the same email account.
Roaming signatures are supposed to be an enhancement, as thanks to this feature, users no longer need to set up email signatures in each Outlook instance they use. The caveat is that it might mistakenly overwrite signatures configured previously. To resolve this issue – or rather prevent it altogether – you may want to disable the roaming signatures feature, which will automatically restore your missing signatures. This article explains how to do it.
Elite mail stationery
Setting up an email signature in OWA is one thing. Managing signatures for all mailboxes in a company is a different story.
If you manage an organization and would like to make sure that every email sent by your employees is properly signed, centralizing email signature management is the way to go. This approach guarantees that all members of your organization have consistent, fully detailed, and professionally branded email signatures that align with your internal standards and requirements.
See the articles below to learn how to natively manage email signatures at an organization:
- How to create company-wide email signatures and disclaimers in Microsoft 365
- How to set up email disclaimers on Exchange Server
While the native methods for central email signature management can help unify signatures across an organization, they still fall short in some departments. In a nutshell, they:
- don’t allow you to position signatures directly beneath the latest reply or forward,
- don’t support inline images,
- don’t let you incorporate individual user photos,
- and there’s no way to preview signatures before sending an email or to view them in the Sent Items folder.
These gaps can affect consistency and functionality of email signatures across your company, making it challenging at times to maintain a polished email experience.
In order to overcome these limitations, you will need to use a third-party tool, such as CodeTwo Email Signatures 365 (for Microsoft 365) and CodeTwo Exchange Rules Pro (for Exchange Server). Check out the short video below to find out how our software can help you elevate your email game:
A brief history of Outlook on the web
And last but not least, you may be wondering how Outlook on the web ever came to be referred to as OWA. The answer is simple: OWA is the abbreviation of Outlook Web App, and it stuck to the newer name. Outlook Web App, originally known as Outlook Web Access, was first introduced in the late 1990s. Over time, OWA gained new features and had its interface changed more than once. With the rise of Office 365 (which is now Microsoft 365), OWA became deeply integrated into Microsoft’s cloud ecosystem and was eventually rebranded as Outlook on the web. The key difference between OWA and other Outlook versions is that there is no need to install anything on your device, apart from an internet browser. While all Outlook apps are similar when it comes to email signature options, the way you access signature settings is different. If you’d like to learn more about the latest version of Outlook on the web and its capabilities, check out the resources available at the Microsoft Support page.